La realizzazione di tappeti con la pistola per tufting sta vivendo un momento di gloria.
E per una buona ragione.
È uno di quegli hobby in cui si può creare qualcosa di utile e di bello. Inoltre, la barriera d'ingresso è più bassa di quanto si possa pensare.
In questa guida, come professionista tappeti tufted personalizzati produttore, vi mostrerò come realizzare esattamente un tappeto con la pistola per tufting dall'inizio alla fine.
Immergiamoci subito.
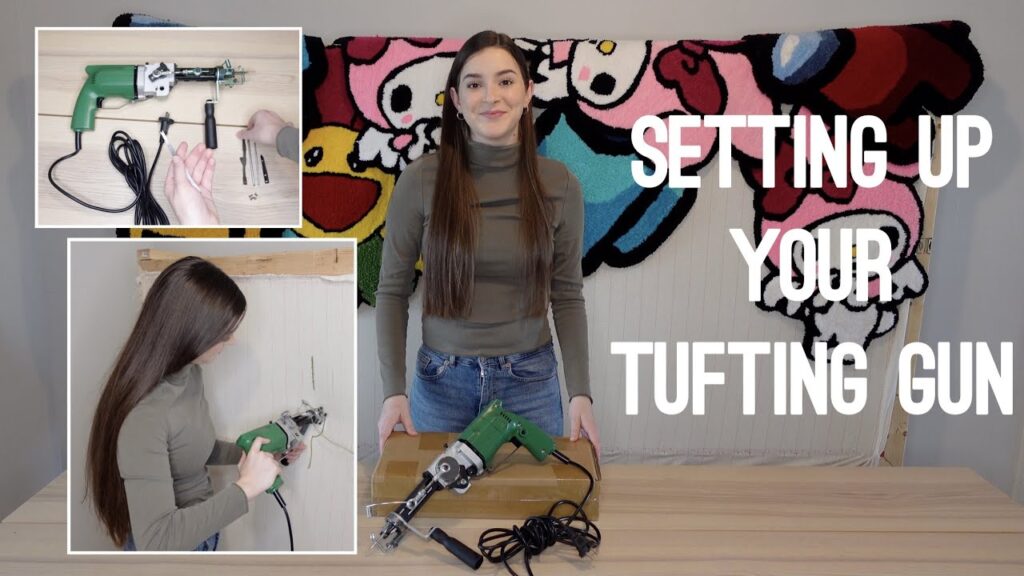
Che cos'è una pistola per tufting?
Prima di tutto, le cose da fare:
La pistola per tufting è fondamentalmente una macchina portatile che perfora il filato attraverso il tessuto ad alta velocità.
Consideratela come una macchina da cucire con gli steroidi. Solo che, invece di cucire insieme i tessuti, crea delle asole (o le taglia) per formare un tappeto di peluche.
Il fatto è questo:
Le pistole per ciuffi sono di due tipi principali:
Pistole per pali tagliati: Tagliano automaticamente il filato mentre si procede, creando la classica trama di un tappeto sfocato.
Pistole per pali ad anello: Lasciano intatte le asole, per una finitura più strutturata e durevole.
Alcune pistole possono fare entrambe le cose. Ma tendono ad essere più pesanti e più costose.
Materiali essenziali per il tufting dei tappeti
Prima di iniziare il tufting, occorre l'attrezzatura giusta.
Ecco cosa vi serve esattamente:
1. Pistola per tufting
Questo è il vostro strumento principale.
I prezzi variano da $150-$400 a seconda del luogo di acquisto e delle caratteristiche desiderate.
Suggerimento: se siete alle prime armi, una pistola per pali tagliati di base va benissimo. Si può sempre fare un upgrade in seguito.
2. Telaio per l'imbottitura
È necessario un telaio di legno robusto che tenga fermo il tessuto.
Il telaio deve essere:
- Abbastanza forte da gestire la pressione della pistola
- Grande abbastanza per il vostro progetto
- Stabile (quindi non si ribalta)
Vi consiglio di costruirvelo da soli. È più economico e si possono personalizzare le dimensioni.
3. Tessuto di supporto primario
Questa è la vostra tela.
Il tessuto Monks è lo standard di riferimento in questo caso. È stato progettato specificamente per gestire la punzonatura ad alta velocità della pistola per ciuffi.
Tessuto normale? Si strapperà. Fidatevi di me.
4. Filato
La scelta del filato è più importante di quanto si possa pensare.
Le opzioni migliori:
- Acrilico: Conveniente e disponibile in tantissimi colori
- Lana: Più costoso ma super resistente
- Cotone: Può essere difficile da lavorare
La maggior parte dei tufter utilizza 2-4 fili di filato alla volta per una migliore copertura.
5. Adesivo per tappeti
Una volta terminato il ciuffo, è necessario incollare il retro.
Altrimenti? Il vostro bellissimo tappeto spargerà come un golden retriever in estate.
Cercate un adesivo per tappeti a base di lattice o una colla di gomma sintetica.
6. Tessuto di supporto secondario
Questo copre il retro incollato del tappeto.
Il feltro funziona benissimo. Lo stesso vale per il materiale di supporto dei tappeti antiscivolo.
7. Altri strumenti
Completate il vostro kit di strumenti con:
- Forbici affilate
- Pennarelli indelebili
- Pistola per colla a caldo
- Strisce di fissaggio per la moquette (per il telaio)
Come realizzare un tappeto con la pistola per tufting: Processo passo dopo passo
Ora la parte più divertente.
Ecco come creare il vostro primo tappeto tufted:
Fase 1: Impostazione della cornice
Per prima cosa, fissare le strisce di moquette intorno ai bordi del telaio.
Le strisce devono essere rivolte verso l'esterno con i chiodi rivolti verso il centro.
Quindi, stendere il panno dei monaci sul telaio.
E intendo dire stretto. Come un tamburo. Se riesci a far rimbalzare una moneta, sei a posto.
La stoffa deve essere abbastanza tesa da non afflosciarsi quando si inizia a infilare i ciuffi.
Fase 2: creazione del design
È il momento di essere creativi.
Avete alcune opzioni:
Opzione 1: Disegnare direttamente sul tessuto con un pennarello indelebile.
Opzione 2: Utilizzare un proiettore per tracciare un disegno
Opzione 3: A mano libera (se vi sentite coraggiosi)
Importante: Ricordate che il vostro disegno sarà specchiato sul fronte. Quindi, se si tratta di un testo, capovolgerlo.
Fase 3: Infilare la pistola per ciuffi
L'infilatura è semplice una volta che ci si è abituati.
Far passare il filo attraverso il guidafilo superiore. Quindi utilizzare lo strumento per infilare il filo per farlo passare attraverso il foro dell'ago.
Assicuratevi che il filato scorra senza problemi dal cono o dal gomitolo alla pistola. Eventuali strappi rovineranno il ciuffo.
Fase 4: inizio dell'impuntura
È qui che avviene la magia.
Tenere saldamente la pistola con entrambe le mani. Premere il piedino contro il tessuto. Premere il grilletto e muoversi lentamente.
Alcuni punti chiave:
- Sempre con il ciuffo dal basso verso l'alto
- Mantenere una pressione costante
- Muoversi a ritmo costante
- Sovrapporre leggermente le linee per una copertura completa
Iniziare a delineare il disegno. Poi riempite le aree più grandi.
Non preoccupatevi se all'inizio sembra disordinato. Potrete pulirlo in seguito.
Fase 5: applicare la colla
Una volta completato il progetto, è il momento di concludere l'affare.
Mentre il tappeto è ancora sul telaio, capovolgerlo (o accedere al retro).
Applicare uno strato spesso e uniforme di adesivo per tappeti su tutte le aree con ciuffi. Assicurarsi che ogni filo sia coperto.
Questo passaggio è fondamentale. Se lo saltate, il vostro tappeto cadrà a pezzi.
Lasciare asciugare per 24-48 ore. La pazienza è fondamentale.
Fase 6: rimozione e rifinitura
Dopo che la colla è completamente asciutta, rimuovere con cautela il tappeto dal telaio.
Ritagliare il tessuto di supporto in eccesso, lasciando circa 5 cm intorno al disegno.
Utilizzate forbici affilate. Quelle opache renderanno questo passaggio molto più difficile del necessario.
Fase 7: Rifinitura dei bordi
Ripiegare il tessuto in eccesso sul retro e fissarlo con la colla a caldo.
Tagliare quindi il supporto secondario a misura. Fissarlo con colla spray o con altra colla a caldo.
Questo conferisce al tappeto un aspetto professionale e rifinito.
Fase 8: Intaglio e taglio (facoltativo)
Volete portare il vostro tappeto al livello successivo?
Utilizzate delle forbici per tappeti per incidere le linee del disegno. Questo crea profondità e fa risaltare i colori.
È possibile anche tranciare l'intera superficie per ottenere un aspetto uniforme e lucido.
Errori comuni da evitare
Lasciate che vi risparmi qualche grattacapo.
Ecco i principali errori che vedo commettere ai principianti:
Errore #1: Tessuto allentato
Se il tessuto non è a tenuta di tamburo, si otterranno ciuffi irregolari e si potrebbe strappare il tessuto.
Errore #2: saltare la colla
Non lo sottolineerò mai abbastanza. Niente colla = tappeto rovinato.
Errore #3: Muoversi troppo velocemente
La velocità si ottiene con la pratica. Iniziate lentamente e con costanza.
Errore #4: Spessore del filato errato
Se è troppo sottile, il tappeto sembra rado. Se è troppo spesso, non si alimenta correttamente.
Errore #5: ignorare la direzione della grana
Tamponare sempre in un'unica direzione. Cambiando direzione a metà progetto si creano linee visibili.
Suggerimenti professionali per risultati migliori nel tufting
Volete migliorare il vostro gioco di tufting?
Provate queste tecniche avanzate:
Usate più colori in modo strategico
Non buttate insieme i colori a caso.
Pianificate le transizioni di colore. Mescolate tonalità simili per ottenere sfumature. Usate colori contrastanti per dare risalto ai disegni.
Padroneggiare la pressione
Pressione costante = altezza costante del cumulo.
Esercitarsi su tessuti di scarto finché non si riesce a mantenere una pressione costante.
Investite in filati di qualità
Il fatto è questo:
Un filato scadente crea tappeti dall'aspetto scadente.
Scegliete un filato di qualità migliore. I vostri pezzi finiti avranno un aspetto (e una durata) molto migliore.
Mantenere pulita la pistola
La lanterna si accumula rapidamente nella pistola per ciuffi.
Pulirlo dopo ogni progetto. Oliate regolarmente le parti mobili.
Una pistola ben mantenuta funziona meglio e dura più a lungo.
Risoluzione dei problemi comuni
Avete problemi?
Ecco come risolvere i problemi più comuni:
Problema: il filo continua a rompersi
Soluzione: Controllare la tensione. Troppo tesa = filo spezzato.
Problema: altezza irregolare della pila
Soluzione: Rallentare e concentrarsi su un angolo e una pressione coerenti della pistola.
Problema: strappo del tessuto
Soluzione: Il tessuto potrebbe essere troppo allentato o di bassa qualità. Stirate nuovamente o migliorate il vostro supporto.
Problema: inceppamento della pistola
Soluzione: Eliminare la lanugine del filato e controllare che gli aghi non siano piegati.
Ripartizione dei costi
Vi state chiedendo quanto vi costerà questo hobby?
Ecco un budget realistico:
- Pistola per tufting: $150-400
- Materiali del telaio: $50-100
- Panno per monaci: $20-40 per metro
- Filato: $50-200 (a seconda delle dimensioni del progetto)
- Adesivo: $30-50
- Altre forniture: $50-100
Costo totale di avviamento: $350-900
Non è economico. Ma rispetto ad altri hobby creativi? Piuttosto ragionevole.
Investimento di tempo
Discorso vero e proprio:
Il primo tappeto richiederà più tempo del previsto.
Un piccolo tappeto di 2×2 piedi potrebbe richiedere:
- Progettazione e configurazione: 1-2 ore
- Ciuffo: 3-5 ore
- Incollaggio e asciugatura: 24-48 ore (per lo più in attesa)
- Finitura: 1-2 ore
Man mano che si diventa più veloci, si possono realizzare piccoli tappeti in un fine settimana.
Dove vendere i vostri tappeti trapuntati
State pensando di trasformarlo in un'attività secondaria?
Una mossa intelligente. I tappeti personalizzati si vendono a buon prezzo.
Le migliori scommesse:
- Etsy (enorme mercato di tappeti fatti a mano)
- Instagram (costruire un seguito, vendere direttamente)
- Fiere dell'artigianato locale
- Commissioni personalizzate
Prezzate il vostro lavoro in modo equo. Tenete conto dei materiali, del tempo e del livello di competenza.
Linea di fondo
Apprendimento come realizzare un tappeto con la pistola tufting apre un mondo di possibilità creative.
Sì, c'è una curva di apprendimento. E sì, i costi di avvio non sono banali.
Ma una volta presa la mano?
Creerete tappeti personalizzati che costerebbero centinaia (o migliaia) nei negozi.
Inoltre, c'è qualcosa di profondamente soddisfacente nel creare arte funzionale con le proprie mani.
Iniziate con un progetto semplice. Imparate le basi. Poi date sfogo alla vostra creatività.
Fidatevi di me: Una volta terminato il primo tappeto, ne rimarrete affascinati.