Ever wondered how those super plush, custom rugs you see all over Instagram are made?
What is rug tufting? It’s a textile craft where you punch yarn through fabric to create carpets, rugs, and wall hangings. Think of it as painting with yarn using a special tool called a tufting gun.
And here’s the kicker:
Rug tufting has EXPLODED in popularity over the last few years. In fact, the hashtag #rugtufting has over 500 million views on TikTok.
But there’s a lot of confusion about what rug tufting actually involves.
So in this guide, as a professional custom tufted rugs manufacturer, I’m going to break down everything you need to know about rug tufting, including:
- How the tufting process works
- The tools and materials you need
- Different tufting techniques
- Whether it’s worth getting into as a hobby (spoiler: it depends)
Let’s dive in.
What Exactly Is Rug Tufting?
Here’s the deal:
Rug tufting is the process of creating textile surfaces by inserting yarn loops through a backing fabric.
You’re basically punching hundreds (or thousands) of yarn strands through a piece of stretched fabric to create a dense, plush surface.
The technique itself isn’t new. Commercial carpet manufacturers have used tufting machines since the 1950s. In fact, over 90% of carpets made today use some form of tufting technology.
But here’s where it gets interesting:
Around 2020, hobbyists started using handheld tufting guns to create custom rugs at home. And social media went CRAZY for it.
Why? Because you can create incredibly detailed, personalized designs that would cost thousands of dollars if you bought them retail.
For example, I’ve seen people create:
- Exact replicas of famous paintings
- Custom pet portraits
- Abstract art pieces
- Anime characters
- Brand logos
The possibilities are basically endless.
How Does The Rug Tufting Process Actually Work?
Let me break down the entire process step by step.
Step 1: Design Creation
First, you need a design.
Most people either:
- Draw directly onto their backing fabric
- Use a projector to trace a design
- Create a digital pattern and transfer it
Pro tip: Start simple. Your first rug shouldn’t be the Mona Lisa.
Step 2: Frame Setup
Next, you stretch your primary backing fabric (usually monk’s cloth or tufting cloth) onto a wooden frame.
Think of it like stretching a canvas for painting. Except this canvas needs to be SUPER tight. Any slack will mess up your tufting.
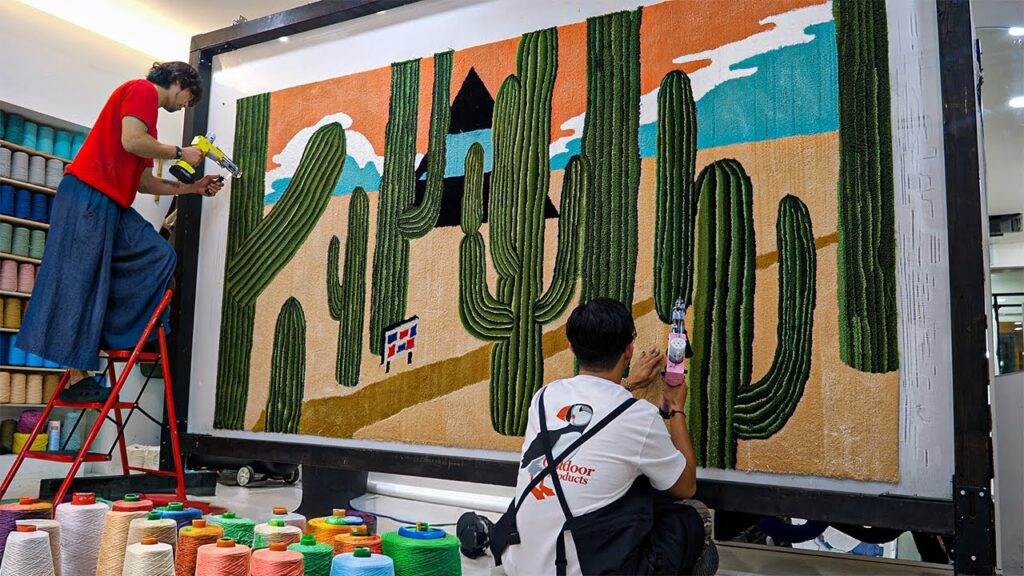
Step 3: The Actual Tufting
This is where the magic happens.
You thread your tufting gun with yarn and start punching it through the fabric. The gun works by:
- Piercing the fabric with a needle
- Pushing a loop of yarn through
- Either cutting the loop (cut pile) or leaving it intact (loop pile)
You work from the back of the rug, following your traced design. It’s like coloring in reverse.
Step 4: Gluing
Here’s something most beginners don’t realize:
Those yarn tufts aren’t actually attached to anything. They’re just poked through the fabric.
So you NEED to apply carpet adhesive to the back. Otherwise, your beautiful rug will fall apart the second someone steps on it.
Step 5: Finishing
Finally, you:
- Trim any uneven spots
- Add a backing fabric for a clean finish
- Bind the edges
And boom. You’ve got yourself a custom rug.
Types of Tufting Techniques
Not all tufting is created equal.
There are two main pile types you can create:
Cut Pile Tufting
This is what most people think of when they imagine a tufted rug.
The tufting gun cuts each yarn loop as it’s inserted, creating that classic fluffy, shaggy texture. Think of your typical living room carpet.
Benefits:
- Super soft and plush
- Great for detailed designs
- Easier for beginners
Downsides:
- Uses more yarn
- Can shed more over time
Loop Pile Tufting
Instead of cutting the yarn, loop pile keeps each strand intact.
This creates a more textured, woven appearance. It’s the same technique used for commercial carpets in offices and hotels.
Benefits:
- More durable
- Uses less yarn
- Creates interesting textures
Downsides:
- Harder to achieve fine details
- Not as soft underfoot
Pro tip: Many tufters combine both techniques in a single rug for added dimension.
Essential Tufting Tools and Materials
Let’s talk gear.
Here’s exactly what you need to get started:
1. Tufting Gun ($150-$400)
This is your main investment.
You’ve got three options:
- Manual punch needles ($20-50): Slow but cheap
- Electric cut pile guns ($150-250): Best for beginners
- Pneumatic guns ($300-400): Professional grade
Most beginners go with an electric cut pile gun. Brands like AK-I or ZQ-II are solid choices.
2. Frame ($50-100)
You can DIY this with 2x4s from Home Depot. Just make sure it’s:
- Sturdy enough to handle tension
- Large enough for your projects
- Easy to adjust
Some people use carpet tack strips for extra grip.
3. Primary Backing Fabric
Your main options:
- Primary tufting cloth: Most popular, doesn’t require special treatment
- Monk’s cloth: Cheaper but needs to be stretched perfectly
- Burlap: Budget option but can be tricky to work with
Expect to pay $15-30 per yard.
4. Yarn
This is where costs can add up FAST.
You’ll want:
- Acrylic yarn: Affordable and durable
- Wool yarn: Premium feel but pricey
- Cotton yarn: Soft but less durable
Plan on using 1-2 pounds of yarn per square foot of rug.
5. Carpet Adhesive
Don’t cheap out here. Good adhesive (like Roberts 3095) runs $30-50 per gallon.
6. Finishing Materials
- Secondary backing fabric
- Binding tape
- Scissors/clippers
- Spray adhesive
Total startup cost? Expect to spend $300-500 for a basic setup.
Is Rug Tufting Actually Worth It?
Let me be straight with you:
Rug tufting isn’t for everyone.
Here’s who should consider it:
You’ll love tufting if you:
- Enjoy hands-on creative projects
- Want unique home decor
- Have space for a permanent setup
- Don’t mind the initial investment
- Have patience for learning curves
Skip it if you:
- Want instant results
- Have limited space
- Are on a tight budget
- Prefer clean, quiet hobbies
The learning curve is real. Your first rug will probably look rough. Your tenth will be museum-worthy.
Common Rug Tufting Mistakes (And How to Avoid Them)
I’ve seen beginners make the same mistakes over and over.
Here are the big ones:
Mistake #1: Loose Fabric
If your backing fabric isn’t drum-tight, you’ll get:
- Uneven pile height
- Wavy lines
- Fabric bunching
Solution: Invest in quality carpet tack strips and take time with setup.
Mistake #2: Wrong Yarn Choice
Not all yarn works for tufting.
Avoid:
- Super thin yarn (breaks easily)
- Novelty yarns with weird textures
- Anything that sheds excessively
Mistake #3: Skipping the Glue
I get it. Gluing is messy and boring.
But without proper adhesive, your rug is basically temporary art.
Mistake #4: Rushing the Design
Complex designs look cool on Instagram.
But start simple. Master basic shapes before attempting photo-realistic portraits.
The Business Side of Rug Tufting
Here’s something interesting:
Some tufters are making serious money from this hobby.
Custom tufted rugs sell for $200-2000+ depending on:
- Size
- Complexity
- Materials used
- Artist reputation
The math can work out pretty well:
- Materials: $50-100
- Time: 10-20 hours
- Selling price: $500-1000
- Profit: $400-900
But (and this is a big but):
Building a customer base takes time. And the market is getting saturated fast.
Modern Innovations in Rug Tufting
The craft is evolving rapidly.
New developments include:
Robot-assisted tufting: Some studios use CNC machines for precise patterns
Eco-friendly materials: Recycled yarns and natural adhesives are gaining popularity
3D tufting: Artists create sculptural pieces with varying pile heights
Mixed media: Combining tufting with embroidery, weaving, or printing
The boundaries keep getting pushed.
Getting Started: Your First Tufting Project
Ready to dive in?
Here’s my advice for your first project:
- Start small: Aim for 2×2 feet max
- Pick a simple design: Geometric patterns work great
- Use affordable materials: Save the premium yarn for later
- Document everything: You’ll want to track your progress
- Join the community: Facebook groups and Discord servers are goldmines of advice
Remember: Your first rug won’t be perfect. And that’s totally fine.
The Bottom Line on Rug Tufting
So, what is rug tufting?
It’s a versatile textile technique that’s transformed from industrial process to creative outlet. Whether you’re looking for a new hobby, a potential business, or just want to understand those viral videos better, rug tufting offers something unique.
The barrier to entry isn’t tiny. But for those willing to invest the time and money, it’s an incredibly rewarding craft that produces functional art.
The tufting community is welcoming, the creative possibilities are endless, and there’s something deeply satisfying about creating a plush, professional-looking rug with your own hands.
Just be warned: It’s addictive. One rug quickly turns into ten.