Vous êtes-vous déjà demandé comment sont fabriqués ces tapis personnalisés super pelucheux que vous voyez partout sur Instagram ?
Qu'est-ce que le touffetage de tapis ? Il s'agit d'un métier textile qui consiste à perforer du fil à travers du tissu pour créer des tapis, des carpettes et des tentures murales. Il s'agit de peindre avec du fil à l'aide d'un outil spécial appelé tufting gun.
Et c'est là que le bât blesse :
La popularité du tufting a explosé ces dernières années. En fait, le hashtag #rugtufting a été vu plus de 500 millions de fois sur TikTok.
Mais il y a beaucoup de confusion sur ce qu'implique réellement le tuftage d'un tapis.
Ainsi, dans ce guide, en tant que professionnel tapis tuftés sur mesure Je vais vous expliquer tout ce que vous devez savoir sur le tufting des tapis, y compris.. :
- Comment fonctionne le processus de tufting
- Les outils et matériaux nécessaires
- Différentes techniques de tufting
- Cela vaut-il la peine de s'y intéresser en tant que hobby (spoiler : cela dépend) ?
Plongeons dans le vif du sujet.
Qu'est-ce que le touffetage de tapis ?
Voici ce qu'il en est :
Le touffetage de tapis est le processus de création de surfaces textiles par l'insertion de boucles de fil à travers un tissu de support.
Il s'agit en fait de perforer des centaines (ou des milliers) de brins de fil à travers un morceau de tissu tendu pour créer une surface dense et pelucheuse.
La technique elle-même n'est pas nouvelle. Les fabricants de moquettes commerciales utilisent des machines à touffeter depuis les années 1950. En fait, plus de 90% des moquettes fabriquées aujourd'hui utilisent une forme ou une autre de technologie de tuftage.
Mais c'est là que les choses deviennent intéressantes :
Vers 2020, des amateurs ont commencé à utiliser des pistolets à touffeter portatifs pour créer des tapis personnalisés à la maison. Et les médias sociaux s'en sont donné à cœur joie.
Pourquoi ? Parce que vous pouvez créer des dessins incroyablement détaillés et personnalisés qui coûteraient des milliers d'euros si vous les achetiez au détail.
Par exemple, j'ai vu des gens créer :
- Répliques exactes de peintures célèbres
- Portraits d'animaux personnalisés
- Oeuvres d'art abstraites
- Personnages d'animation
- Logos de la marque
Les possibilités sont pratiquement infinies.
Comment se déroule le processus de tuftage d'un tapis ?
Permettez-moi de détailler l'ensemble du processus, étape par étape.
Étape 1 : Création du design
Tout d'abord, vous avez besoin d'un modèle.
La plupart des gens non plus :
- Dessiner directement sur le tissu de support
- Utiliser un projecteur pour tracer un dessin
- Créer un modèle numérique et le transférer
Conseil de pro : commencez par la simplicité. Votre premier tapis ne doit pas être la Joconde.
Étape 2 : Configuration du cadre
Ensuite, vous tendez votre tissu de support principal (généralement de la toile de moine ou de la toile à touffeter) sur un cadre en bois.
C'est un peu comme tendre une toile pour peindre. Sauf que cette toile doit être SUPER serrée. Le moindre relâchement gâchera votre tufting.
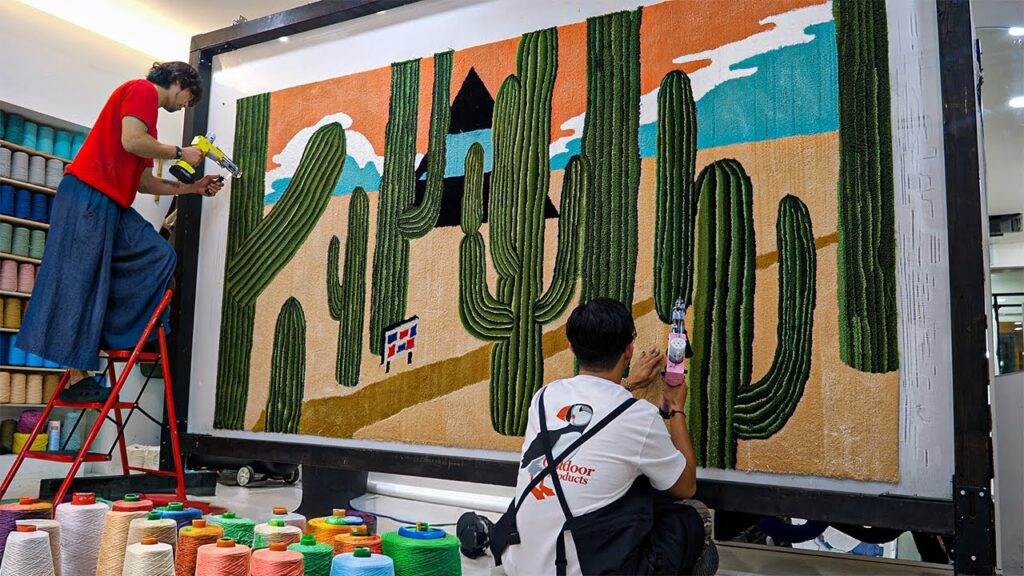
Étape 3 : Le touffetage proprement dit
C'est là que la magie opère.
Vous enfilez le fil dans votre pistolet à touffeter et commencez à le perforer à travers le tissu. Le pistolet fonctionne de la manière suivante :
- Transpercer le tissu avec une aiguille
- Pousser une boucle de fil à travers
- Soit en coupant la boucle (pile coupée), soit en la laissant intacte (pile en boucle).
Vous travaillez à partir de l'arrière du tapis, en suivant le dessin que vous avez tracé. C'est comme faire du coloriage à l'envers.
Étape 4 : Collage
Il y a une chose que la plupart des débutants ne réalisent pas :
Ces touffes de fil ne sont en fait attachées à rien. Elles sont juste percées dans le tissu.
Vous devez donc appliquer de l'adhésif pour tapis sur l'envers. Sinon, votre beau tapis se désagrégera à la seconde où quelqu'un marchera dessus.
Étape 5 : Finition
Enfin, vous :
- Couper les parties irrégulières
- Ajoutez un tissu de soutien pour une finition propre
- Relier les bords
Et boum. Vous avez un tapis personnalisé.
Types de techniques de touffetage
Tous les touffets ne se valent pas.
Il existe deux principaux types de piles que vous pouvez créer :
Tufting à poils coupés
C'est ce qui vient à l'esprit de la plupart des gens lorsqu'ils imaginent un tapis tufté.
Le pistolet à touffeter coupe chaque boucle de fil au fur et à mesure qu'elle est insérée, créant ainsi une texture pelucheuse et hirsute classique. Pensez à la moquette typique de votre salon.
Avantages :
- Super doux et pelucheux
- Idéal pour les dessins détaillés
- Plus facile pour les débutants
Inconvénients :
- Utilise plus de fil
- Peut se dégrader avec le temps
Tufting à poils bouclés
Au lieu de couper le fil, le velours bouclé conserve chaque brin intact.
Cela donne un aspect plus texturé et tissé. C'est la même technique que celle utilisée pour les moquettes commerciales dans les bureaux et les hôtels.
Avantages :
- Plus durable
- Utilise moins de fil
- Crée des textures intéressantes
Inconvénients :
- Il est plus difficile d'obtenir des détails fins
- Moins doux sous les pieds
Astuce : de nombreux touffeurs combinent les deux techniques dans un même tapis pour lui donner plus de dimension.
Outils et matériaux essentiels pour le touffetage
Parlons matériel.
Voici exactement ce dont vous avez besoin pour commencer :
1. Pistolet à touffeter ($150-$400)
Il s'agit de votre principal investissement.
Vous avez trois possibilités :
- Aiguilles à poinçonner manuelles ($20-50) : Lent mais bon marché
- Pistolets électriques de coupe de pieux ($150-250) : Le meilleur pour les débutants
- Pistolets pneumatiques ($300-400) : Qualité professionnelle
La plupart des débutants optent pour un pistolet électrique. Des marques comme AK-I ou ZQ-II sont des choix solides.
2. Cadre ($50-100)
Vous pouvez le faire vous-même avec des 2x4 de Home Depot. Veillez simplement à ce qu'ils soient :
- Suffisamment robuste pour supporter la tension
- Suffisamment grand pour vos projets
- Facile à ajuster
Certaines personnes utilisent des bandes adhésives pour tapis afin de renforcer l'adhérence.
3. Tissu de support primaire
Vos principales options :
- Tissu de touffetage primaire: Le plus populaire, ne nécessite pas de traitement particulier
- Tissu de moine: Moins cher mais doit être parfaitement étiré
- Toile de jute: Option budgétaire, mais il peut être difficile de travailler avec elle
Comptez $15-30 par mètre.
4. Le fil
C'est là que les coûts peuvent s'accumuler rapidement.
Vous voudrez :
- Fil acrylique: Abordable et durable
- Fil de laine: Sensation de qualité supérieure mais prix élevé
- Fil de coton: Souple mais moins durable
Prévoyez d'utiliser 1 à 2 livres de fil par mètre carré de tapis.
5. Adhésif pour tapis
Ne lésinez pas sur les moyens. Un bon adhésif (comme le Roberts 3095) coûte $30-50 le gallon.
6. Matériaux de finition
- Tissu de support secondaire
- Ruban adhésif
- Ciseaux/coupe-papier
- Adhésif en spray
Coût total de démarrage ? Comptez $300-500 pour une installation de base.
Le touffetage des tapis en vaut-il vraiment la peine ?
Permettez-moi d'être franc avec vous :
Le touffetage des tapis n'est pas à la portée de tout le monde.
Voici qui devrait l'envisager :
Vous aimerez le tufting si vous :
- Des projets créatifs et concrets
- Envie d'une décoration d'intérieur unique
- Disposer d'un espace pour une installation permanente
- L'investissement initial ne vous dérange pas
- Faire preuve de patience pour les courbes d'apprentissage
Sautez-la si vous :
- Vous voulez des résultats immédiats
- Disposer d'un espace limité
- ont un budget serré
- Préférence pour les loisirs propres et calmes
La courbe d'apprentissage est réelle. Votre premier tapis aura probablement un aspect rugueux. Votre dixième sera digne d'un musée.
Erreurs courantes dans le touffetage des tapis (et comment les éviter)
J'ai vu des débutants commettre les mêmes erreurs à plusieurs reprises.
Voici les plus importants :
Erreur #1 : Tissu lâche
Si le tissu de soutien n'est pas étanche, vous obtiendrez des résultats :
- Hauteur inégale de la pile
- Lignes ondulées
- Le gonflement du tissu
Solution : Investissez dans des bandes adhésives de qualité et prenez le temps de les installer.
Erreur #2 : Mauvais choix de fil
Tous les fils ne se prêtent pas au tufting.
Éviter :
- Fil très fin (se casse facilement)
- Fils fantaisie aux textures étranges
- Tout ce qui perd ses poils de façon excessive
Erreur #3 : Omettre la colle
J'ai compris. Le collage, c'est salissant et ennuyeux.
Mais sans un adhésif adéquat, votre tapis n'est qu'une œuvre d'art temporaire.
Erreur #4 : La précipitation dans la conception
Les dessins complexes ont l'air cool sur Instagram.
Mais commencez simplement. Maîtrisez les formes de base avant de vous lancer dans des portraits photoréalistes.
L'aspect commercial du touffetage de tapis
Voici quelque chose d'intéressant :
Certains tuteurs gagnent beaucoup d'argent grâce à ce hobby.
Les tapis tuftés sur mesure se vendent entre $200 et 2000+, selon le type de tapis :
- Taille
- Complexité
- Matériaux utilisés
- Réputation de l'artiste
Le calcul peut s'avérer très efficace :
- Matériaux : $50-100
- Durée : 10-20 heures
- Prix de vente : $500-1000
- Bénéfice : $400-900
Mais (et c'est un grand mais) :
La constitution d'une base de clientèle prend du temps. Et le marché est de plus en plus saturé.
Innovations modernes dans le touffetage des tapis
Le métier évolue rapidement.
Parmi les nouveaux développements, on peut citer
Tufting assisté par robot: Certains studios utilisent des machines à commande numérique pour réaliser des motifs précis
Matériaux écologiques: Les fils recyclés et les adhésifs naturels gagnent en popularité
Touffetage 3D: Des artistes créent des pièces sculpturales avec des piles de différentes hauteurs
Technique mixte: Combinaison du touffetage avec la broderie, le tissage ou l'impression
Les limites ne cessent d'être repoussées.
Pour commencer : Votre premier projet de tufting
Prêt à plonger ?
Voici mes conseils pour votre premier projet :
- Commencer modestement: Visez un maximum de 2×2 pieds
- Choisir un modèle simple: Les motifs géométriques sont très efficaces
- Utiliser des matériaux abordables: Conservez le fil de qualité supérieure pour plus tard
- Tout documenter: Vous voudrez suivre vos progrès
- Rejoindre la communauté: Facebook les groupes et les serveurs Discord sont des mines d'or de conseils
N'oubliez pas : votre premier tapis ne sera pas parfait. Et c'est tout à fait normal.
L'essentiel sur le touffetage des tapis
Ainsi, Qu'est-ce que le tufting de tapis ??
Il s'agit d'une technique textile polyvalente qui est passée du stade de processus industriel à celui de débouché créatif. Que vous soyez à la recherche d'un nouveau passe-temps, d'une entreprise potentielle ou que vous souhaitiez simplement mieux comprendre les vidéos virales, le tufting de tapis vous offre quelque chose d'unique.
La barrière à l'entrée n'est pas mince. Mais pour ceux qui sont prêts à investir du temps et de l'argent, c'est un métier incroyablement gratifiant qui produit de l'art fonctionnel.
La communauté du tufting est accueillante, les possibilités créatives sont infinies et il y a quelque chose de profondément satisfaisant à créer de ses propres mains un tapis moelleux d'aspect professionnel.
Mais attention : Cela crée une dépendance. Un tapis se transforme rapidement en dix.